PiHole is a super popular Raspberry Pi project, and for good reason. It uses a Raspberry Pi as a DNS server, so it can look up any advertisement- and tracker-related IPs and send such queries to not your devices and/or home network. In addition to making internet browsing less annoying, it also makes it safer, and declogs a lot of traffic. In this post, I’m going to talk about how I set up my PiHole on a headless Raspberry Pi Zero W.
Set Up a Headless Pi
First, we’re going to download Balena Etcher and the latest Raspberry Pi OS Lite image on a non-Pi computer (preferably, on a Linux machine). Then, we’re going to use Balena Etcher to flash the Raspberry Pi OS onto a small Micro SD card (I’m using a 16 GB card).
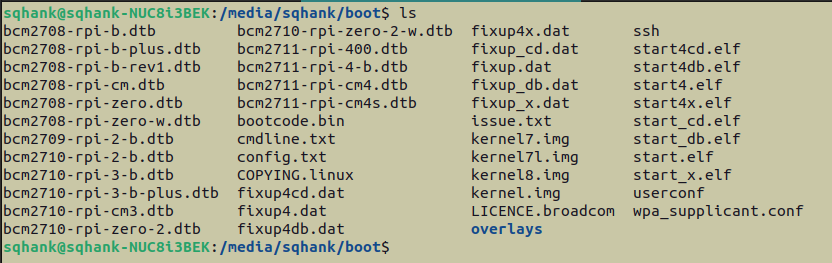
Once we’ve done that, we’re going to generate a blank ssh file (with no file extension) in the /boot directory of the flashed SD card’s boot partition. We’re going to all this on our non-Pi machine, so don’t shove the SD card in the Pi yet:
touch /media/<your-username>/boot/ssh
We’re also going to generate another file in the same /boot directory, called wpa_supplicant.conf, This file will not be blank, however, and we’re going to paste in the following:
country=<your-2-letter-country-code>
ctrl_interface=DIR=/var/run/wpa_supplicant GROUP=netdev
update_config=1

network={
    ssid="<your-internet-network-name>"
    psk="<your-internet-network-password>"
}
Great, so those changes will tell the Pi which internet network to connect to upon booting up, and also that it should enable SSH.
In addition, we need to supply a password to our Pi’s username, because as of 2022, the default password for Raspberry Pis is no longer “raspberry”, for obvious security reasons. So unlike in 2021, when we SSH into the Pi and are prompted for a password, we can’t input “raspberry” and expect to fly. Instead, we’re going to make another file in the /boot directory called userconf or userconf.txt:
touch /media/<your-username>/boot/userconf
We’re then going to open up the file in your favourite text editor, and type in a single line of text that reads:
<your-username>:<an-encrypted-representation-of-your-password>
You might now be wondering what I mean by an ‘encrypted representation’ of a password. It’s exactly what it sounds like, and to generate one, we have to input the echo '<mypassword>' | openssl passwd -6 -stdin command, and then we’re going to paste the output into the userconf file as outlined above. So, so far, your /boot directory should have a ssh file, a wpa_supplicant.conf file, and a userconf file.
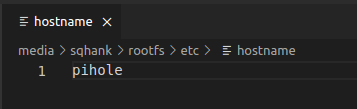
Next, we’re going to change the user and machine names. If you have your share of Pis, it’s a little confusing to have them all named raspberrypi with the username pi, so it helps to name them something specific. For my PiHole, I name the machine pihole, and the username pihole. To do so, we’re going to go into the /rootfs/etc/hostname file, and change the contents from the default raspberrypi to pihole. We’re then going to do the same thing for the /rootfs/etc/hosts file.
Try SSHing
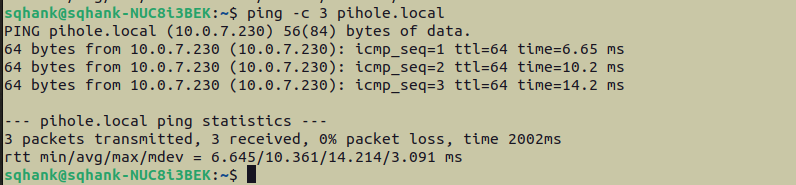
We’re finally ready to eject the SD card, and pop it in the Pi. Put the SD card in, and then power up the Pi. Then, hop back onto the non-Pi machine, and check that the Pi is connected to the WiFi, with the following command. N.B. This command will only work if the Pi and the non-Pi machine are connected to the same WiFi network:
ping -c 3 pihole.local
If the ping command is successful, the command should return something like this:
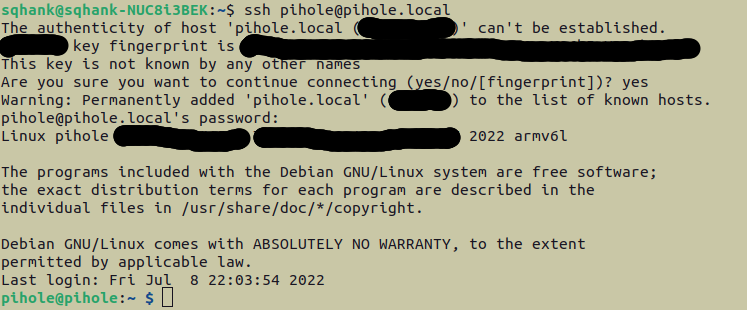
We can now try SSHing into the Pi, which might take a few tries. Just keep spamming the following command until you manage to successfully SSH into the Pi:
ssh pihole@pihole.local
A successful SSH connection will return something like so:
Add an SSH key to the Pi
We’re going to add (another) SSH key to the Raspberry Pi, so we don’t need to input our password everytime, and we’re going to give the password a proper name.
We’re going to generate the SSH key on the non-Pi machine. We start with the following command:
ssh-keygen
We are going to be prompted to save the key in the default directory. That’s fine, but let’s rename the filename to something more meaningful than the default file name, id_rsa … we’re going to call it pihole ![]()
![]()
![]() . The return output should look something like so:
. The return output should look something like so:
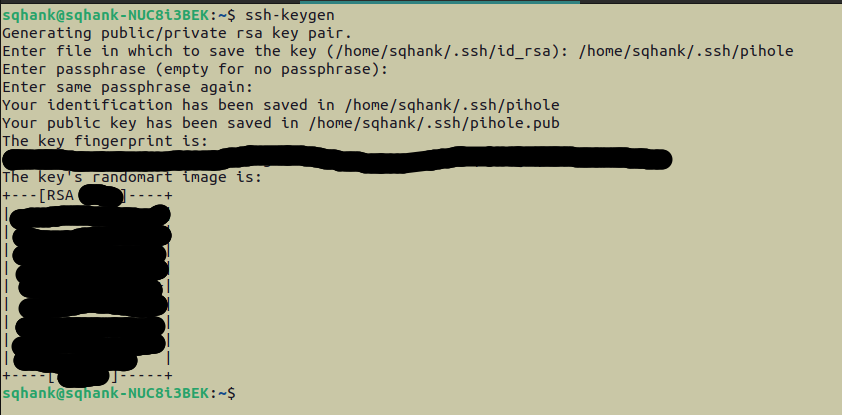
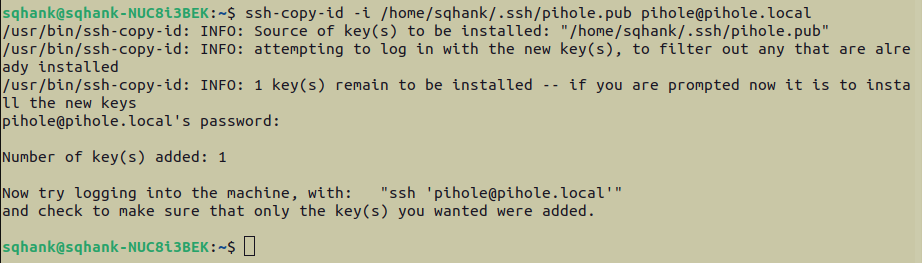
We should now have a private key generated at the specified path–in the case of the above screenshot, at /home/sqhank/.ssh/pihole–and a public key generated at the other specified path–again, in the case of the above screenshot, at /home/sqhank/.ssh/pihole.pub. We can think of the public key like a lock, which we need to send over to the Raspberry Pi, and the private key like a very secure … key … which can grant us access to the Pi. So, to get the public key / ‘lock’ to the Pi, we have to copy it to the Pi, with the ssh-copy-id command:
ssh-copy-id -i <origin-path-to-public-ssh-key.pub> <destination-path-to-which-to-copy-public-ssh-key.pub>
A successful output of the above command will look something like this:
Update
We can now update the Pi like we would with most Linux systems. This command will take a while to complete:
sudo apt-get update && sudo apt-get upgrade -y
Make the Pi’s IP Static
This step is critical for getting PiHole to work. To make the Pi’s IP static, we’re first going to SSH into the Pi, and check its device IP address, as well as the router’s IP address. We can do so with either the more outdated ifconfig and sudo route -n commands, or with the more up-to-date ip address show and ip route show commands.
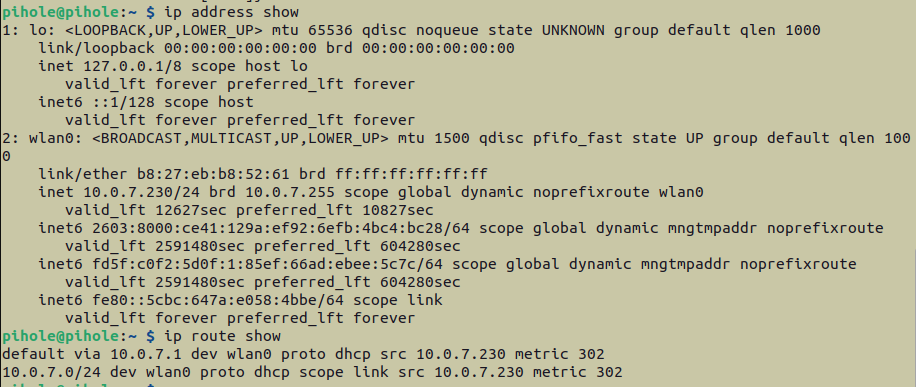
10.0.7.230 (displayed by the wlan0 section), and the router’s IP address is 10.0.7.1.
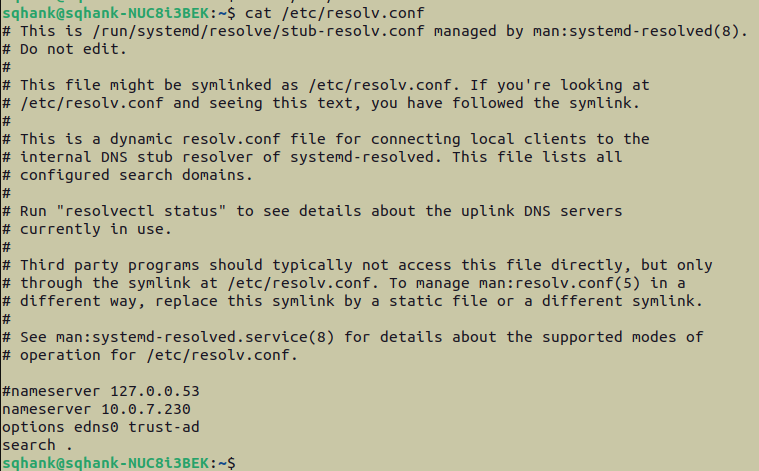
We’re also going to want the current DNS server address that the Pi is using. To do so, we just need to look into the /etc/resolv.conf file:

Great! Write down the Pi’s current IP address, the router’s IP address. and the DNS server’s IP address somewhere. We’re going to use them now to make the Pi’s IP static. Open up /etc/dhcpcd.conf in your favourite text editor, so we can make the following edits:
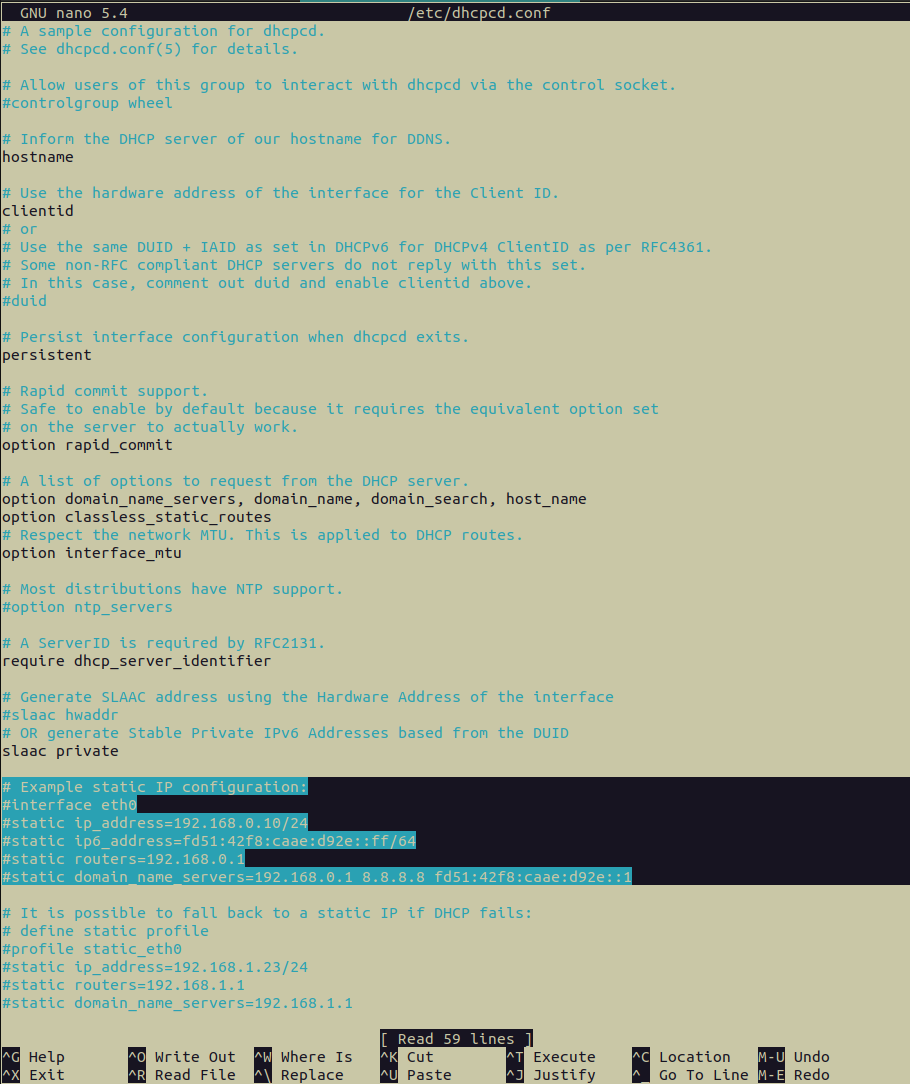
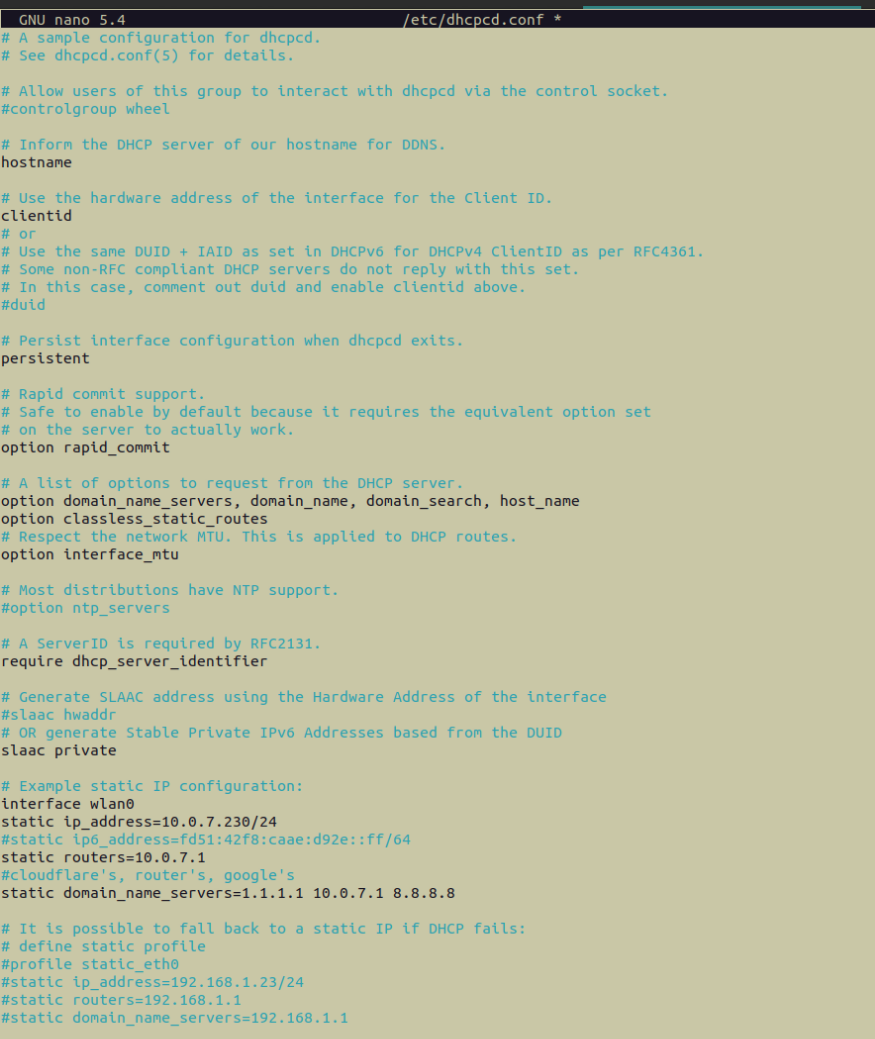
dhcpcd.conf file, with the part that we need to edit highlighted in blue. On the right side is the modified dhcpcd.conf file that has all the necessary information for setting the PiHole's IP address to be static.In the screenshot of the above modified dhcpcd.conf file, we can see that we specified the static IP address as a wireless connection (interface wlan0), and we set the static IP address to be the address that we got out from the ip address show command (static ip_addres=10.0.7.230/24), i.e. the current IP address that’s assigned to the Pi. If you’re curious about the /24 suffix, it’s just saying that of the 32 bits in the IPv4 address space, 24 bits are contained in the network. So, 32 - 24 = 8 bits are left for address space, i.e. 256 possibilities ranging from 0 to 255. We can see that we’re not using the IPv6 address, which is expected for most set-ups (you’ll know if you want to be using IPv6). Finally, we can see the IPs of the DNS servers we’re using in the static_domain_name_servers parameter. We’re using 1.1.1.1, which is Cloudflare’s, 10.0.7.1, which is our router’s, as determined by the ip route show command above, and 8.8.8.8, which is Google’s.
Once we’ve made the above changes to dhcpcd.conf, we’re going to exit the terminal, and reboot the Pi (I tend to reboot the Pi physically here :woozy-face:). Then, we’re going to try and SSH back into the Pi. Feel free to use the ping command above, first, (although it’s not strictly necessary at any point). If you can SSH successfully, run the ip address show or some other equivalent command to check the Pi’s IP address is the static one we inputted.
![]() FYI
FYI ![]() : Something that’s very important and worth noting is that some routers will just assign new IP addresses to devices periodically, or upon power cycling. This is generally a good thing, and it’s because most routers use DHCP, or a dynamic host configuration protocol. In other words, even after we’ve changed the IP address to be the specified static one via the Pi’s
: Something that’s very important and worth noting is that some routers will just assign new IP addresses to devices periodically, or upon power cycling. This is generally a good thing, and it’s because most routers use DHCP, or a dynamic host configuration protocol. In other words, even after we’ve changed the IP address to be the specified static one via the Pi’s dhcpcd.conf file, the router will assign the PiHole a new IP address, but the Pi will attempt to use the same old static IP that we specified in dhcpcd.conf. Fortunately, there’s an easy solution to this wrinkle. Pretty much all routers and mesh networks allow users to allocate certain IPs to be static. We just have to go into those router settings and set aside the static IP we want. In the case of the above examples, we’re going to want to allocate the 10.0.7.230 IP address to be static, in the router settings. All router brands have different ways of setting aside static IPs, so just Google your brand to figure out how to get the router to designate a certain IP as static.
Install PiHole
Ok, we’re finally ready to install PiHole! Doing so requires us to go to the official PiHole GitHub repo, and run a bash command. That’s right, it’s just 1 step! So from the PiHole, run this command:
curl -sSL https://install.pi-hole.net | bash
This command should eventually open up an installation wizard. We basically just say yes to everything the wizard asks us.
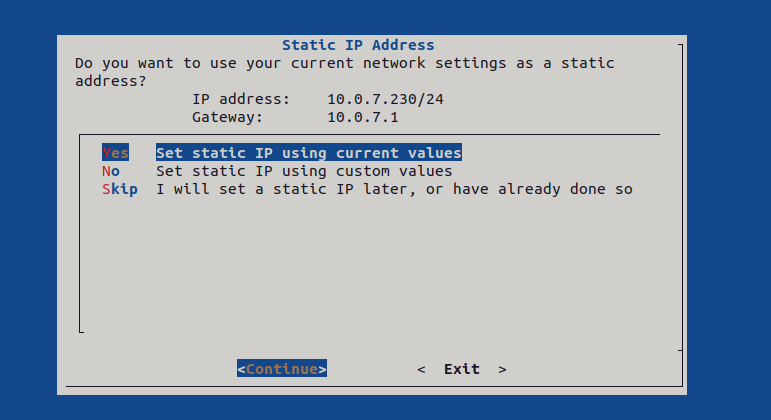
Yes to this step, like we do for all the installation wizard steps, or we can say Skip, because we already made the IP static, with the steps above. Good for us!
Test PiHole
Remember that the core principle of PiHole is that it operates as a DNS server. Given that fact, there are a few ways to get the PiHole’s ad-blocking magic coursing through the WiFi.
1. Manually ecit the DNS server for each device on the WiFi
One is to manually edit the IP address of the DNS server for each device connected to the WiFi that the PiHole is on. This method is a little tedious, but it’s ideal for cases where you want some devices to receive PiHole’s adblocking, and other devices to not.
To put a Linux machine on the PiHole network, we can edit the /etc/resolv.conf file to tell the machine to use the PiHole as a DNS server, by inputting the PiHole’s IP address:
10.0.7.230.
To put an Android machine on the PiHole network, we have to go to the network settings of the WiFi network that the PiHole is on:
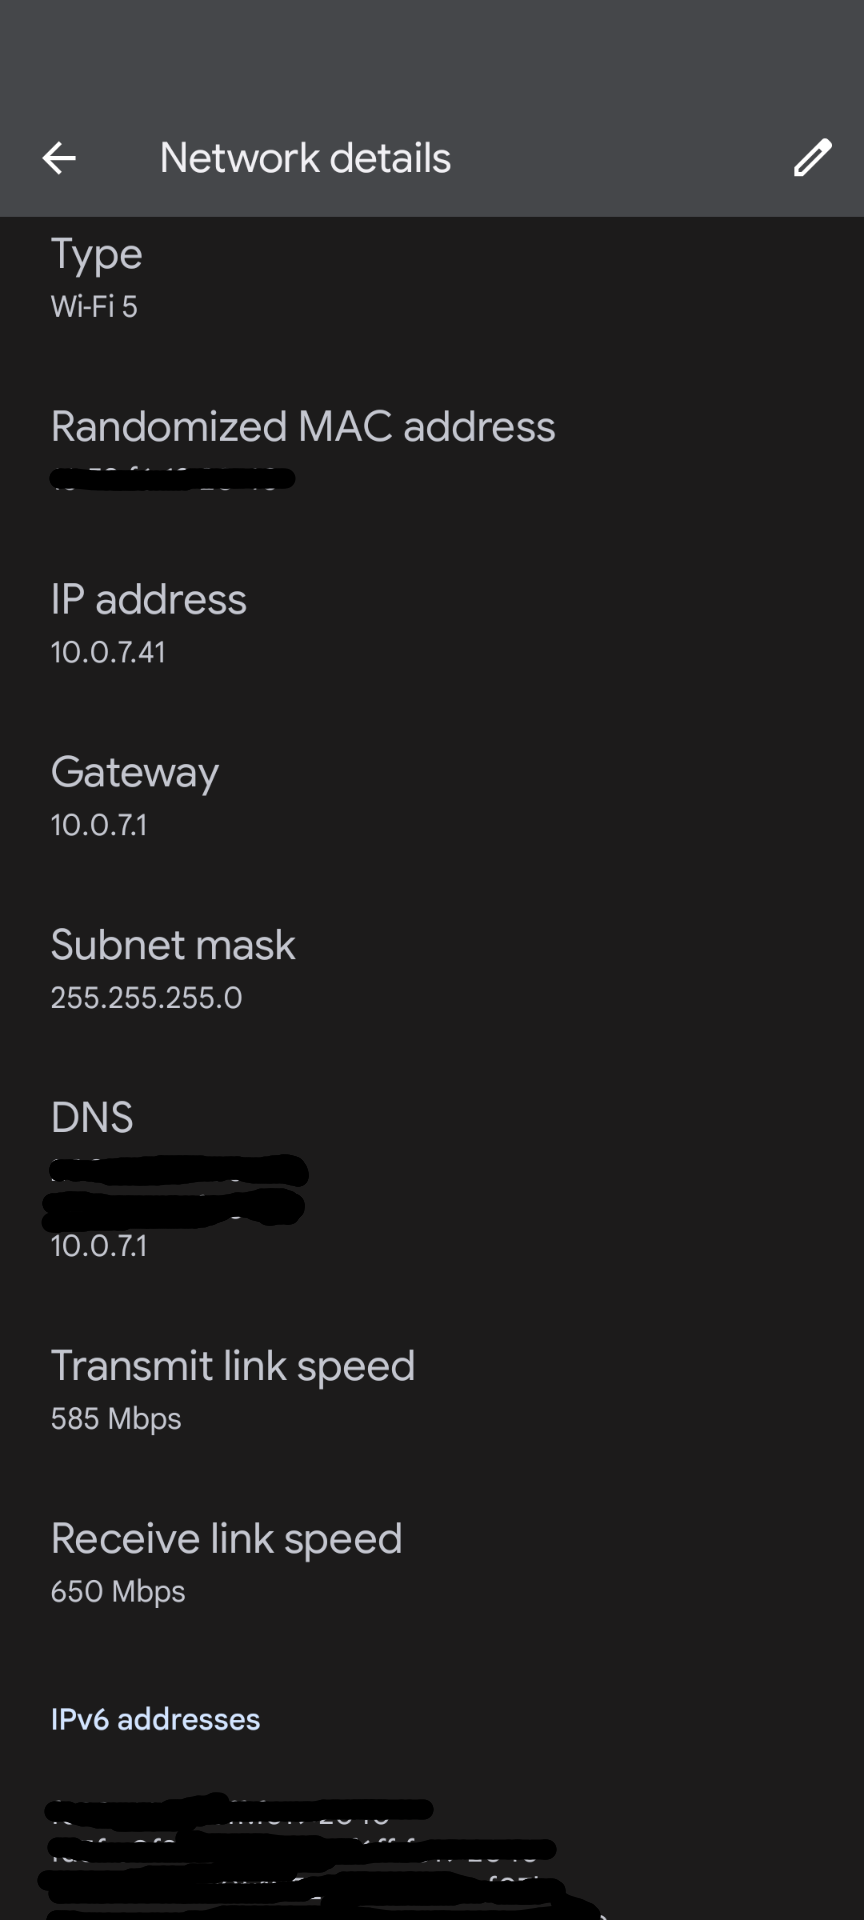
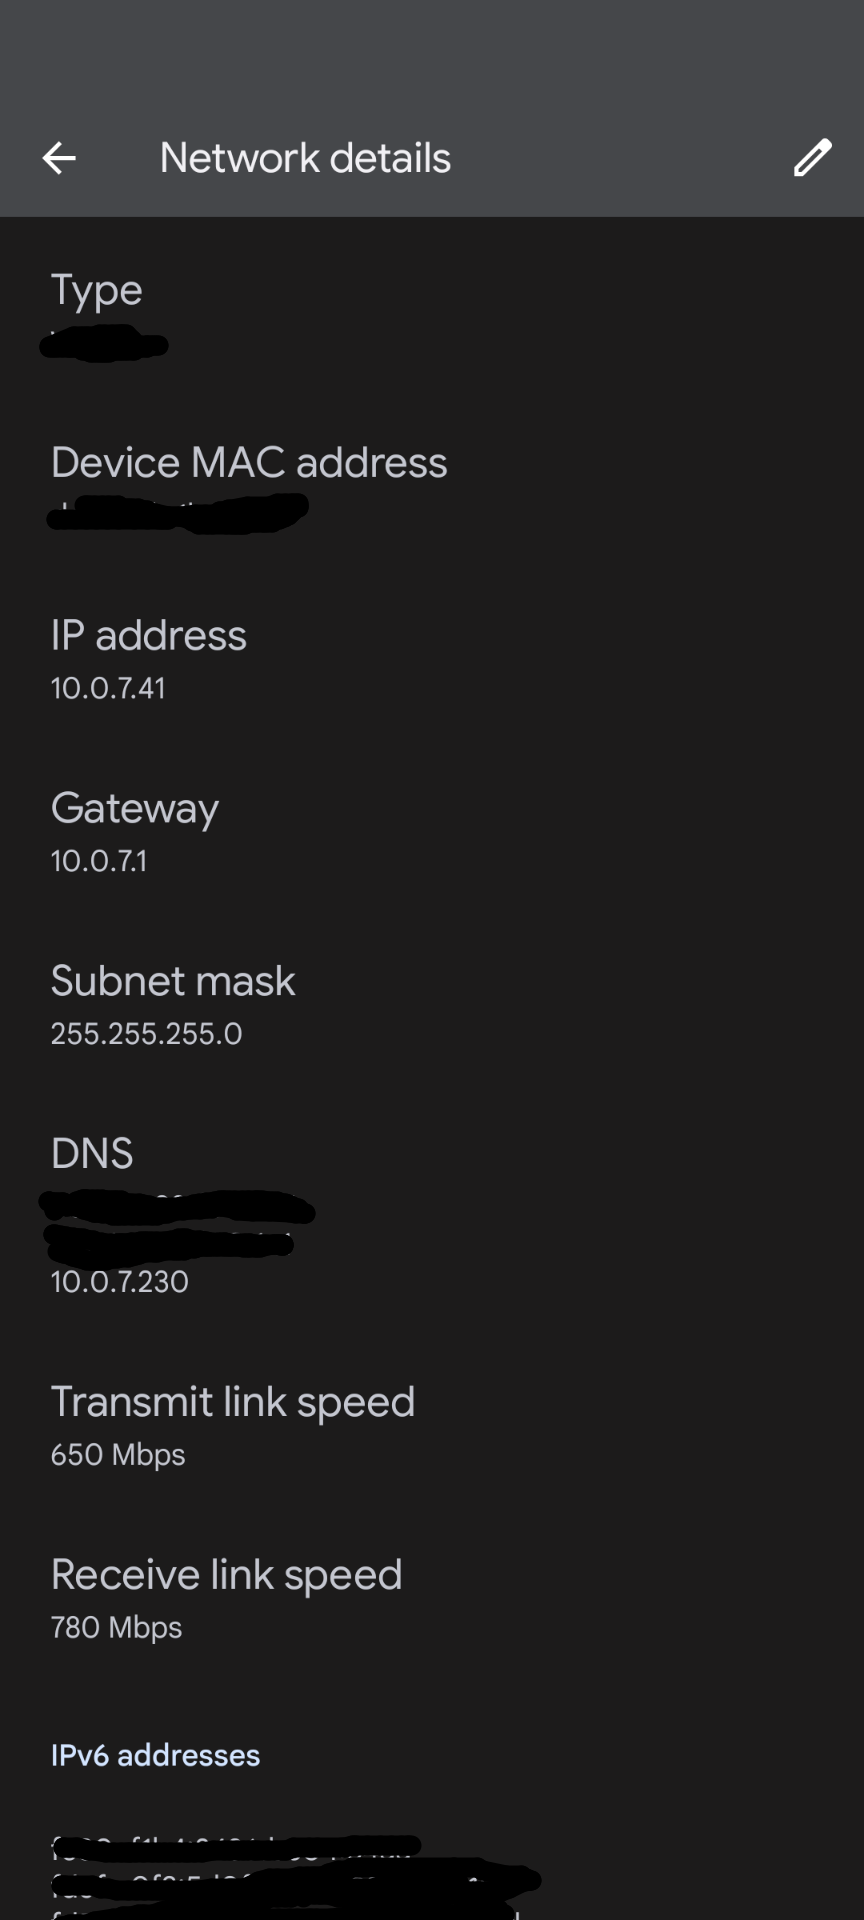
10.0.7.41. We're going to want to write that down somewhere, so that when we change the phone's IP address to be static, we input the IP address that the DHCP previously assigned to the phone. Then, when prompted for DNS 1 and DNS 2, put in the IP address of the PiHole (you don't have to do it for both, just putting it in DNS 1 should be sufficient). Now the PiHole is the DNS server, and ads should be blocked.I’m currently using this configuration, at least until I build and install my pfSense subnetwork.
2. Edit the DNS server for the Wifi router
A more efficient way of making sure all devices that are connected to your WiFi are using PiHole, is by changing the DNS IP address on the actual router to the IP address of the Pi. Doing so again requires us to fiddle around in the router settings, and those settings are different for each router brand, so just Google how to edit the DNS IP for your specific router.
There are a few ways to see whether your devices successfully connected to the PiHole network. One is to visit the PiHole web interface, which is at http://pi.hole/admin, or `https://
pihole -c
and the resulting output will be a nice command line dashboard of some key PiHole statistics. You’re probably going to be finetuning your blocklists and whitelists, as you go about your internet life, but as a starter, a very good collection of blocklists can be found at the firebog. A curated collection of whitelists can be found in the Whitelist repo. Remember to run pihole -g, whenever you update your lists.
And there we have it! We have a functional PiHole on our WiFi network!
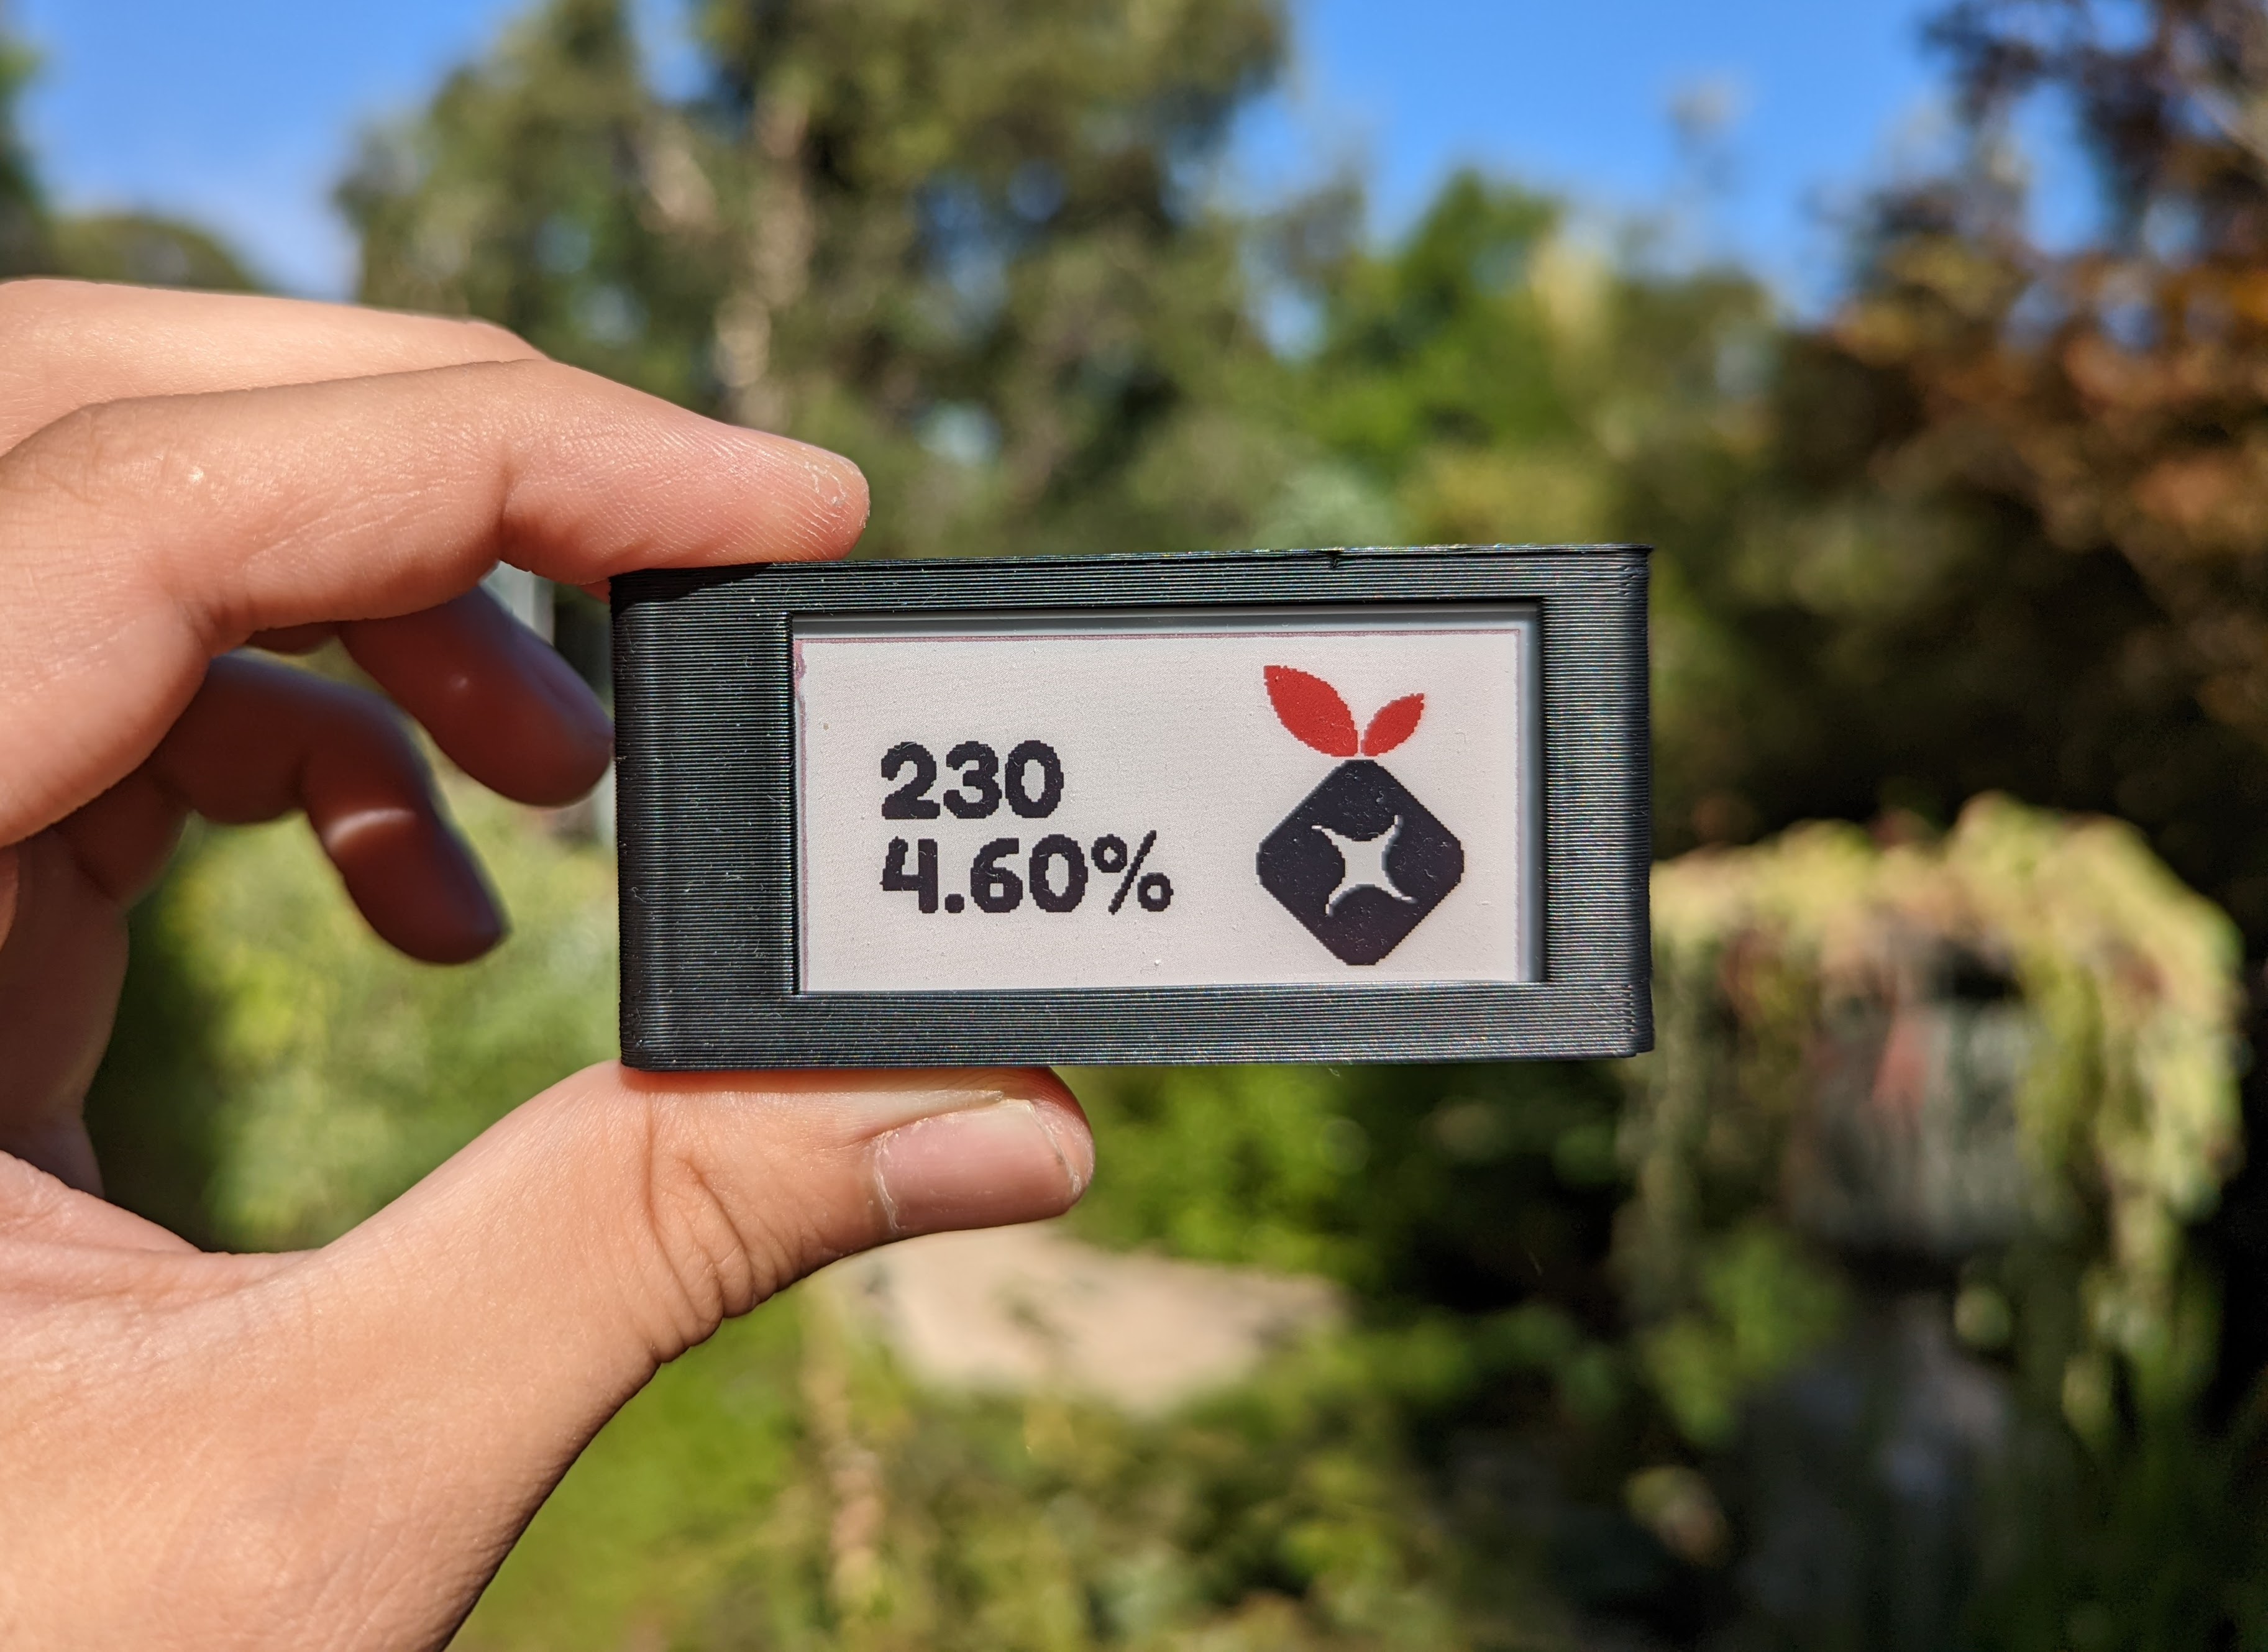
Make a Cool eInk Display
If you want to be a cool kid, I’d very much recommend using the awesome Pimoroni Inky pHAT with your Pi Zero, so you can see critical PiHole statistics all the time on a fun eInk display! To do so, start by downloading the Inky pHAT dependencies and library onto the Pi with:
curl https://get.pimoroni.com/inky | bash
The above line is the only installation step. The installation might say, upon completion, “some packages could not be installed, review the output for details”, but a lot of the times it’s a false positive. I think it throws that warning sometimes when it tries to install packages via apt, even though the installation will then successfully defer to a pypi-based installation :shrug:. To check that the Pimoroni is working, you can run a .py script from the Inky pHAT’s examples/ directory.
Then, clone the Inky Hole repo, and follow the instructions on the main README.md page. That is, edit the crontab, so that the Pi runs the Inky Hole’s main.py periodicially, e.g. every 30 minutes.
If you want the statistics to be displayed upside-down, so that the Pi’s USB ports are on the top, rather than the bottom, you can either install my fork of the repo, or just run git diff on mine vs the original’s main.py file, and make the same changes that I made, to your local version. You can also print out a case for the Pi Zero + Inky pHAT.
And there we have it! A functional PiHole on the WiFi network and a cool hardware display! eInk is great, because it only uses up battery, when the display is being refreshed. So it opens up the possibility for a decent portable PiHole, if that’s of interest. eInk is also just nice and easy on the eyes! ![]()
![]()
![]()
Some Convenient PiHole Commands:
-
pihole -v: Prints the version of PiHole you’re running. -
pihole -g: Run this command after you update your blocklists and whitelists. -
pihole -c: Shows the cool PiHole chronometer dashboard. -
pihole -up: Update the PiHole to the latest stable version.