For whatever reason, uploading bootloaders to virgin µC ICs really trips me up. This post is a running document of bootloader uploading protocols, for keyboards I’ve built that do not use a dev board (e.g. the Arduino Pro Micro, the Nice!Nano, etc.). I’ll say it now . . . 99% of the time, my struggles have to do with me cloning the wrong GitHub branch . . . . I use a Linux (Ubuntu) system for this kind of thing. This blog post assumes that you already know how to use QMK.
Plaid
FYI, I’m using the fork of the Plaid with a USB-C port. The following instructions also work for the original Plaid with a USB mini B port.
Purchase a USBasp programmer with an ICSP pin adaptor (ASIN B0885RKVMC).
Git clone the plaid branch of hsgw’s USBaspLoader fork:
git clone -b plaid https://github.com/hsgw/USBaspLoader.git
Rename the directory from UsbaspLoader to USBaspLoader-plaid, just so you don’t get confused if you have to upload the bootloader for other keyboards via USBasp. Then, cd into the root of the USBaspLoader-plaid directory. Open up the Makefile.inc file with your favourite text editor. Observe lines 39-41 of the Makefile.inc:
# PROGRAMMER contains AVRDUDE options to address your programmer
# PROGRAMMER = -c pony-stk200
# PROGRAMMER = -c usbasp
PROGRAMMER = -c avrispmkII -P usb -v
Change the PROGRAMMER to -c usbasp, because we’re using a USBasp bootloader:
# PROGRAMMER contains AVRDUDE options to address your programmer
# PROGRAMMER = -c pony-stk200
PROGRAMMER = -c usbasp
# PROGRAMMER = -c avrispmkII -P usb -v
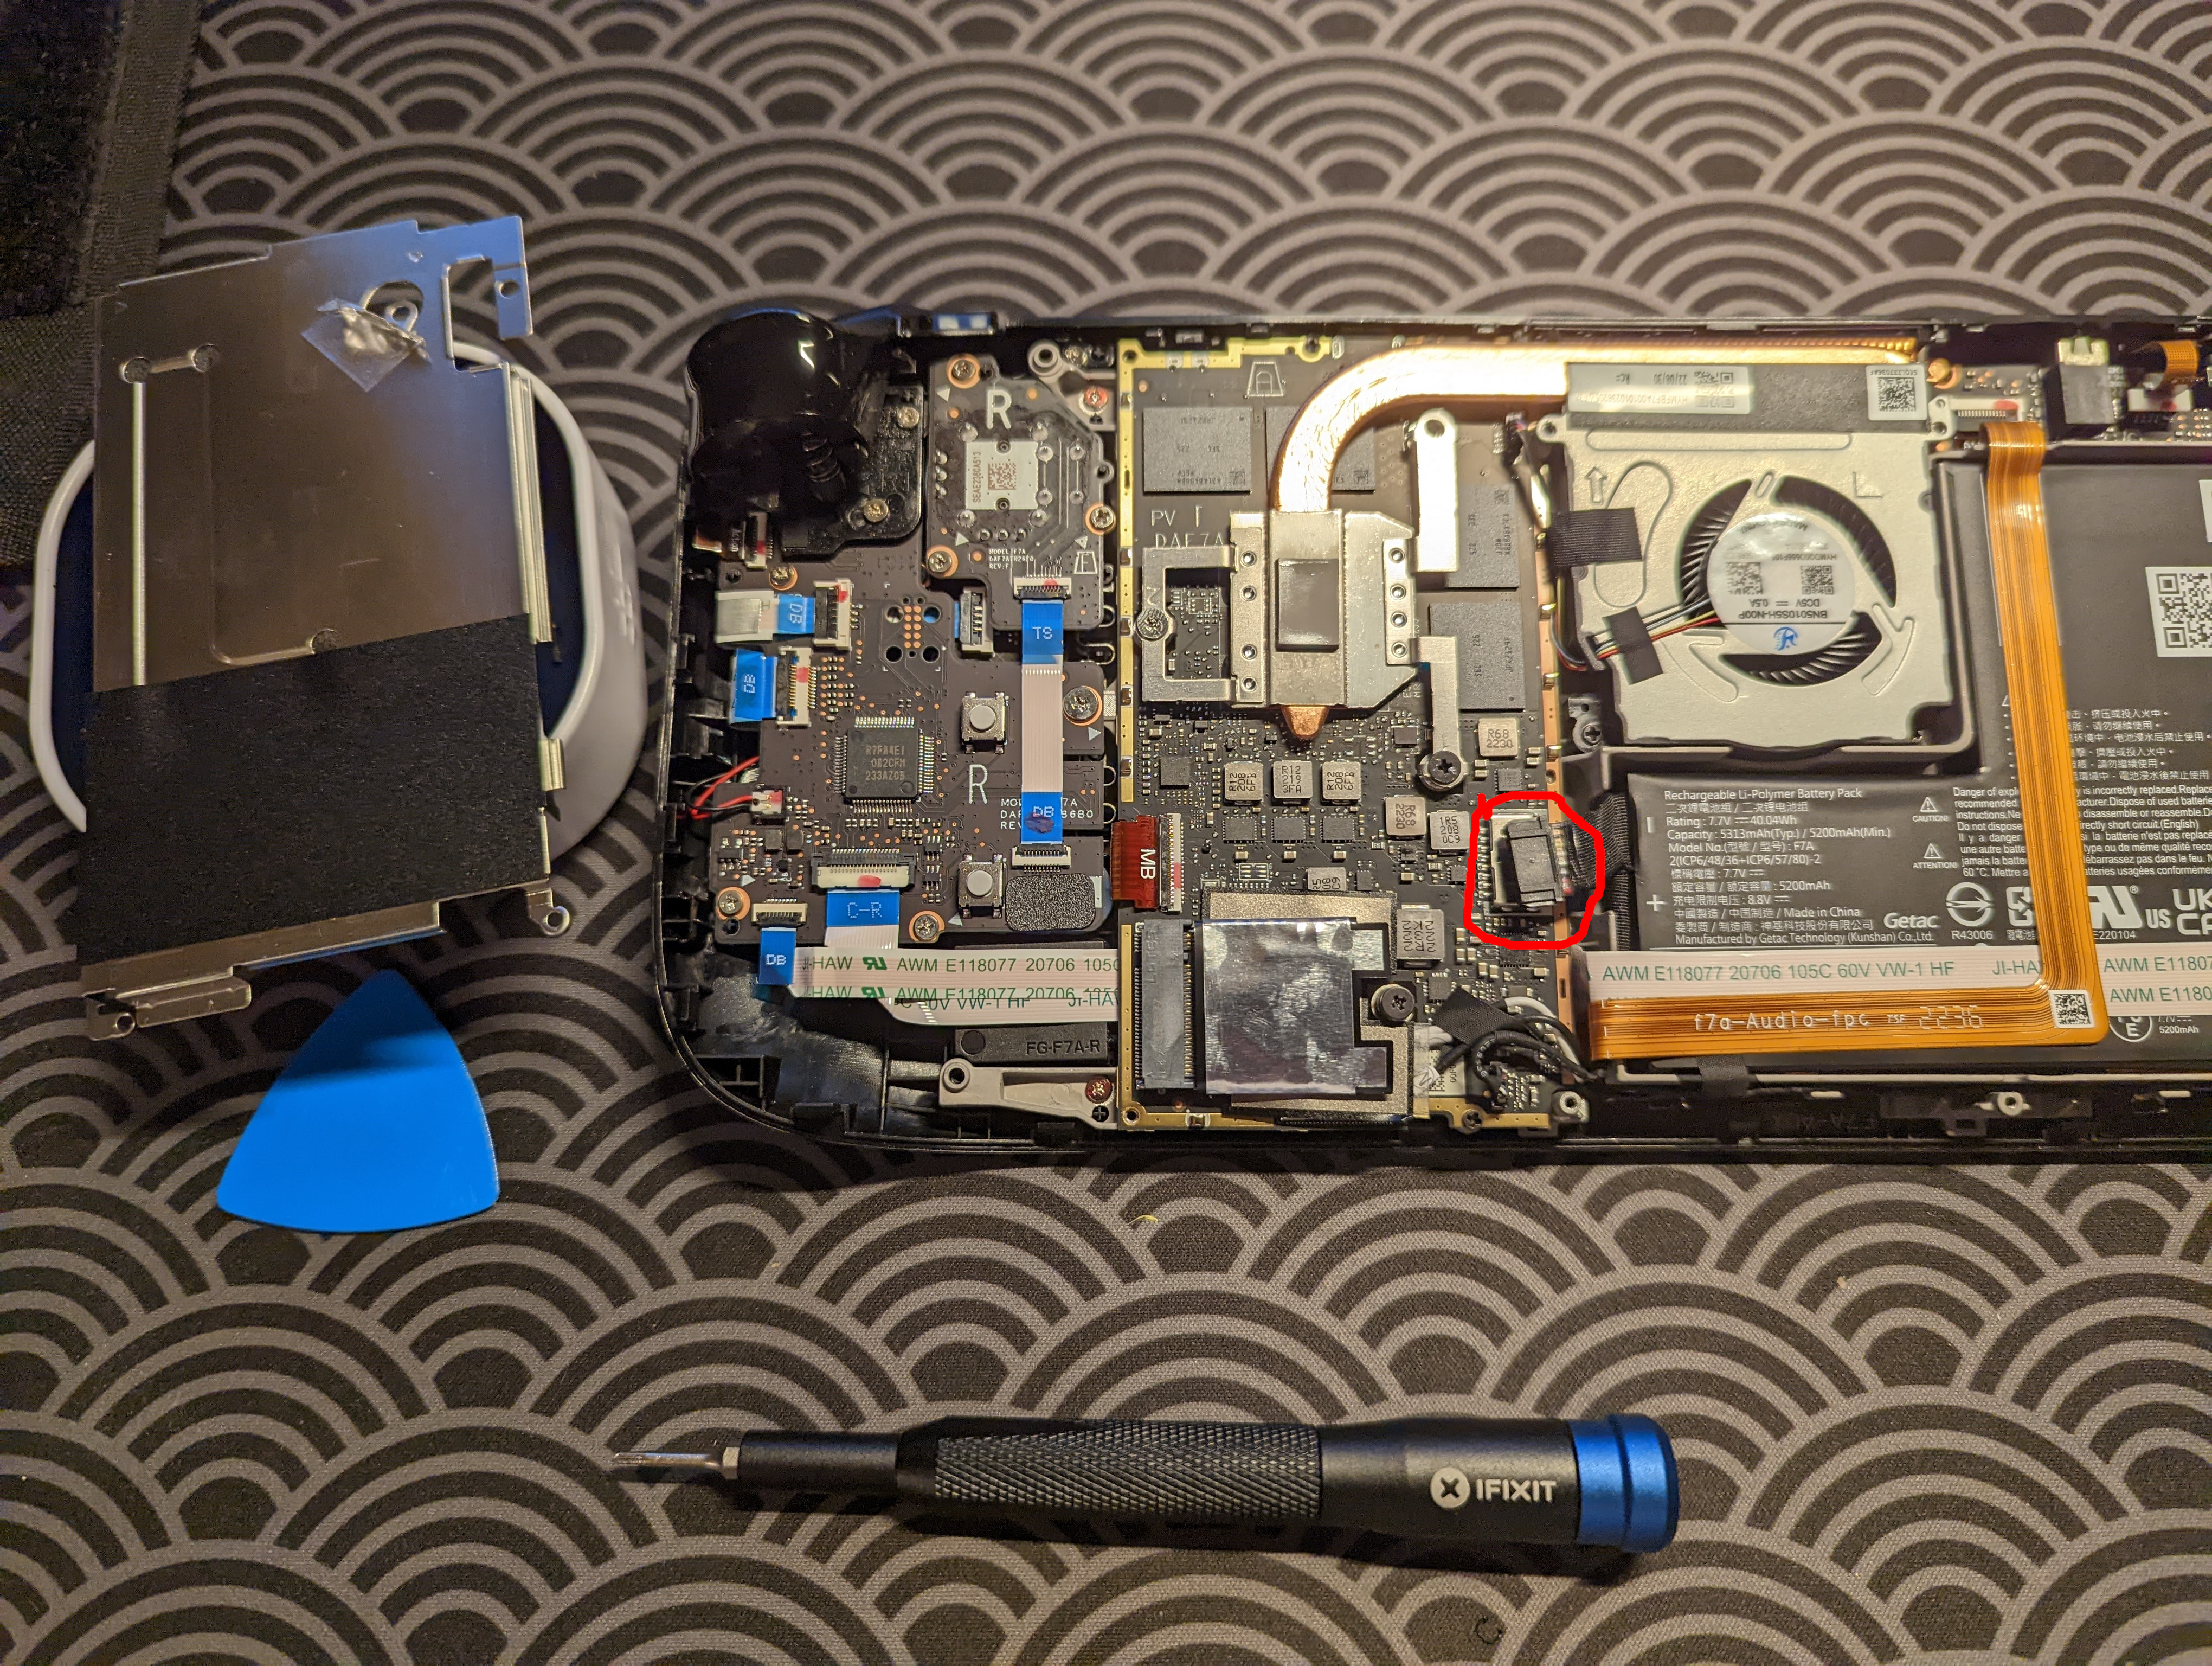
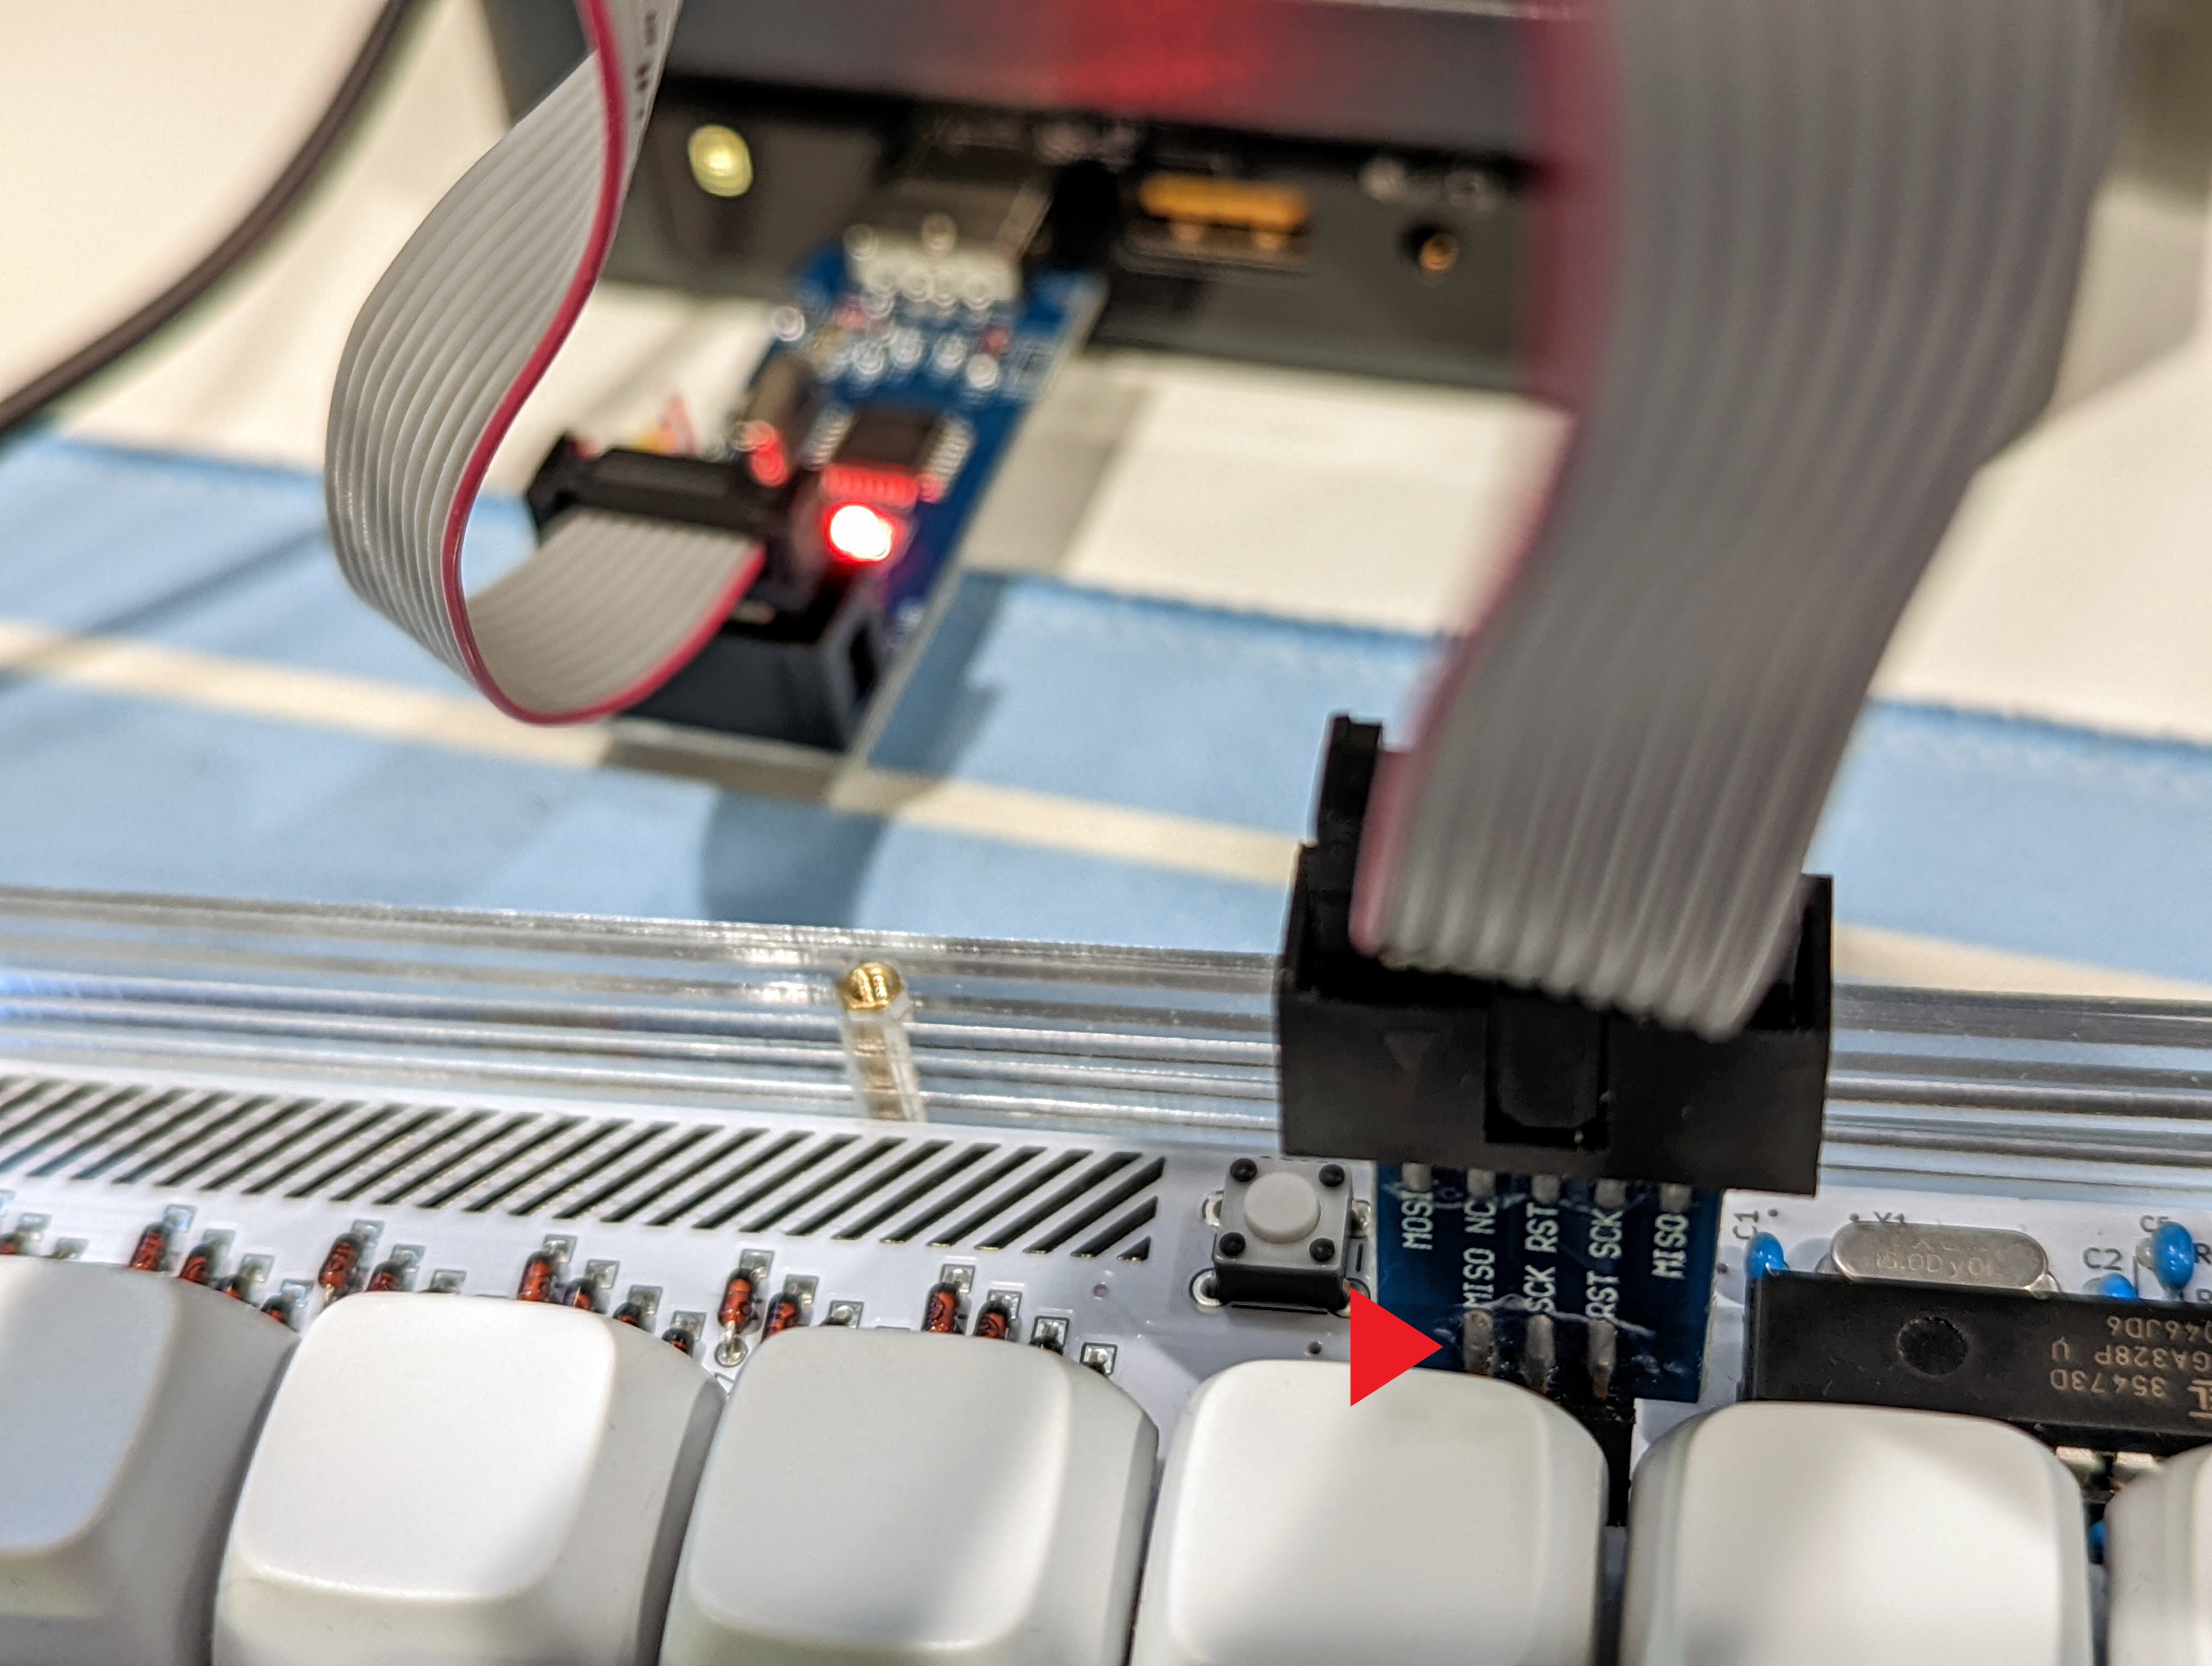
Connect the ICSP cable from the USBasp programmer device, to the 6-pin ICSP header on the Plaid PCB.
Do not yet plug in the USB cable. Only the ICSP cable should be plugged in. From USBaspLoader-plaid, which has the makefile.inc file, run the following:
make flash
The result of the above command should look something like the terminal output below:
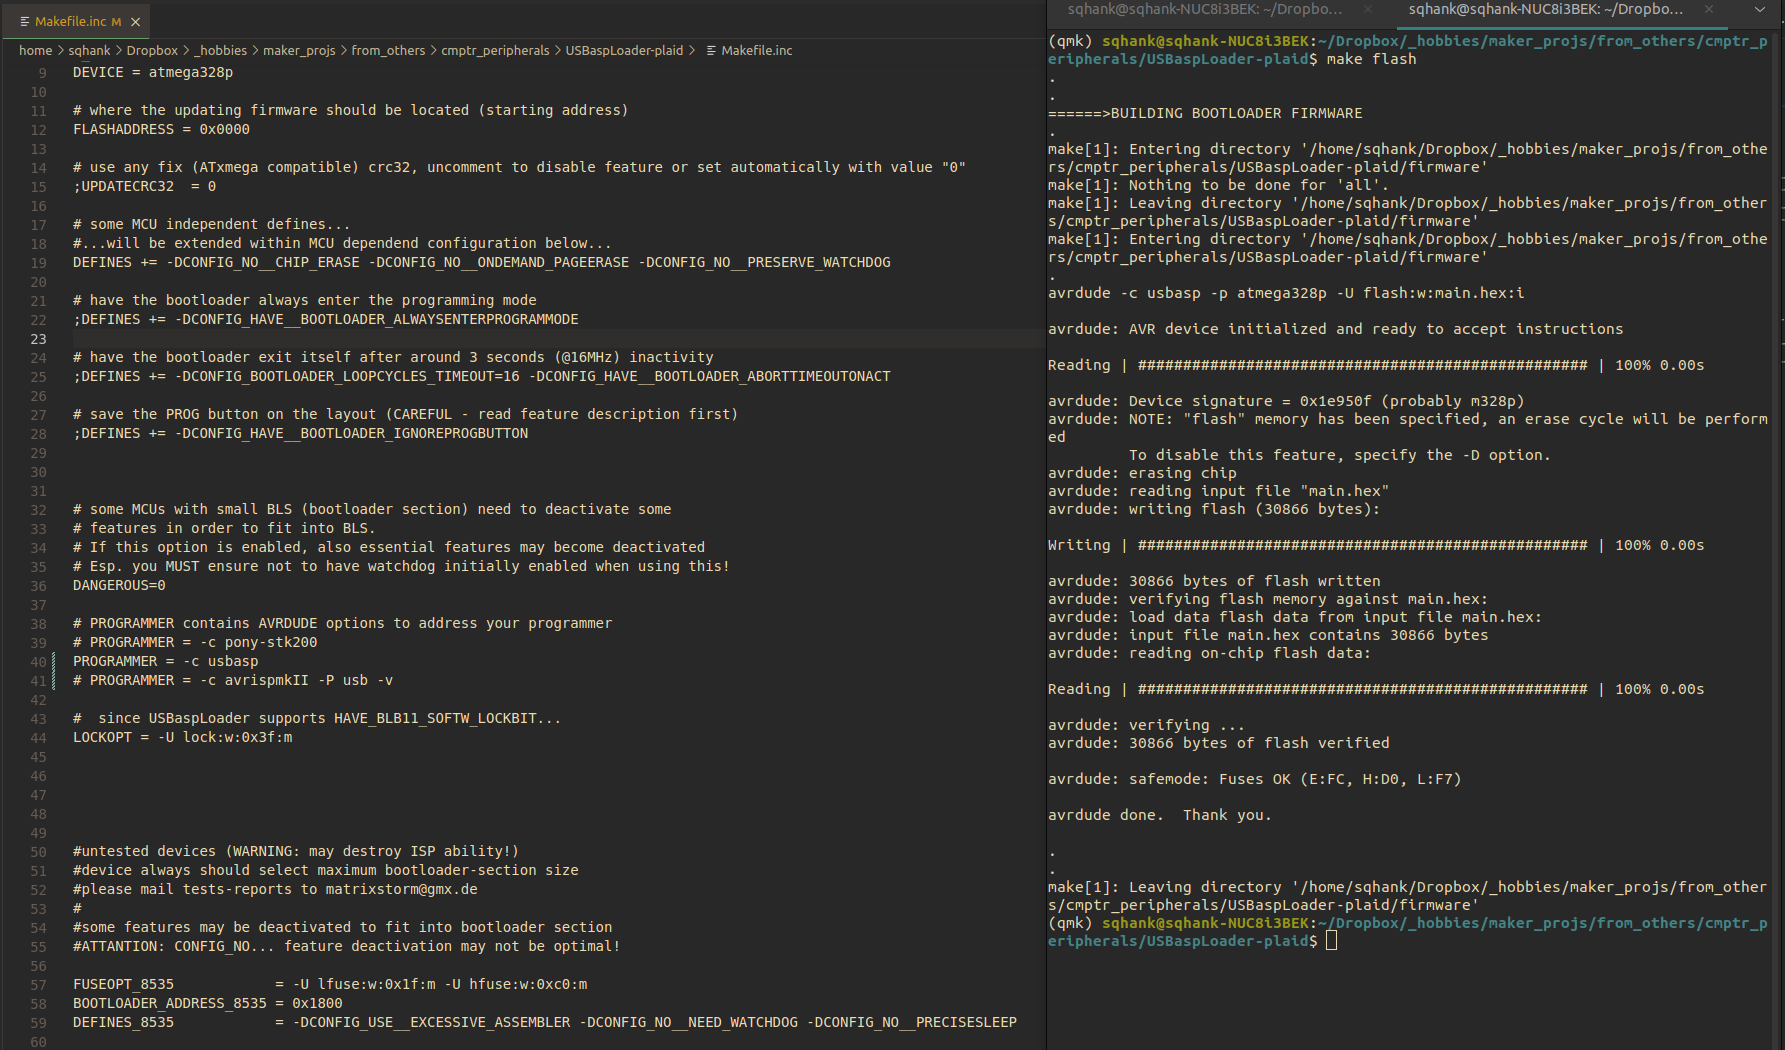
makefile.inc, and the right side shows the output of the make flash command.
Unplug the ICSP header, and plug in the USB cable. Then, follow the instructions from the official Plaid docs. That is:
- Push and hold the RESET switch.
- Push and hold the BOOST switch.
- Release the RESET switch.
- Release the BOOT switch.
Then, navigate to your qmk_firmware directory, and flash the Plaid’s firmware like you would for any QMK-compatible keyboard:
qmk flash -kb dm9records/plaid
The result of the above command should look something like terminal output below:
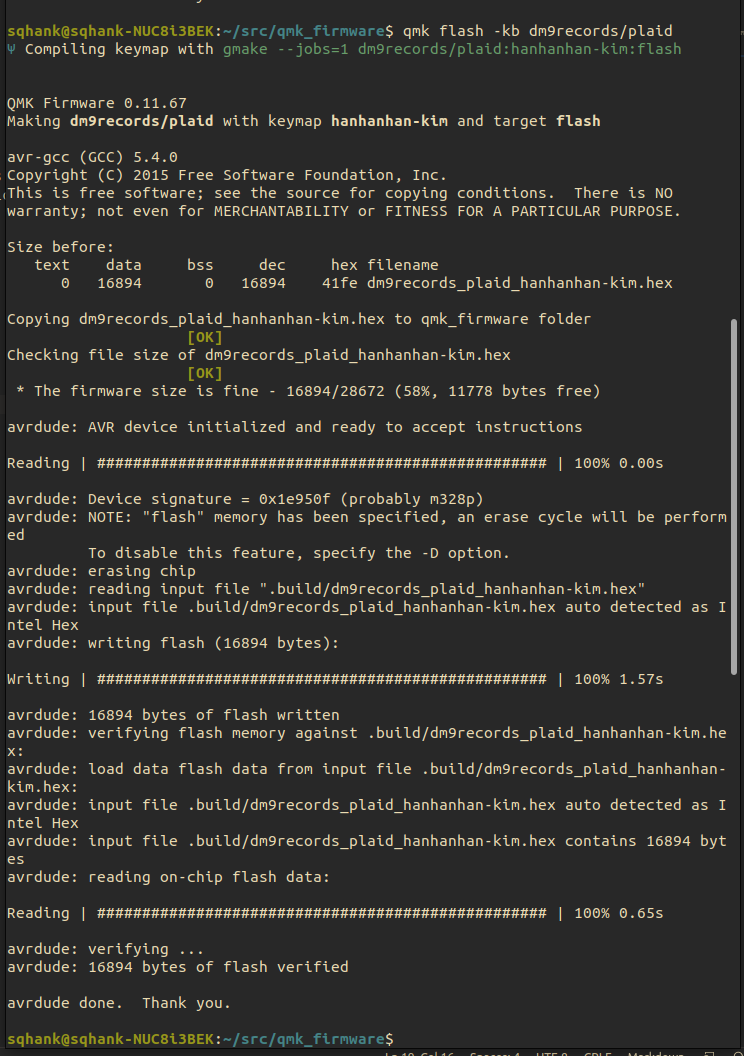
You might be a little confused though, because the Plaid keyboard’s power LED won’t be lit. No worries though, just power cycle the keyboard—unplug and replug the USB cable. The keyboard’s power LED should now be lit. At this point, the bootloader is correctly loaded onto the keyboard, and we can upload QMK firmware via USB ![]() . Just run
. Just run qmk flash -kb dm9records/plaid, and then either hit the BOOT switch, or if you have a key mapped to QK_BOOT, press that key. In other words, flash the keyboard like normal ![]() .
.
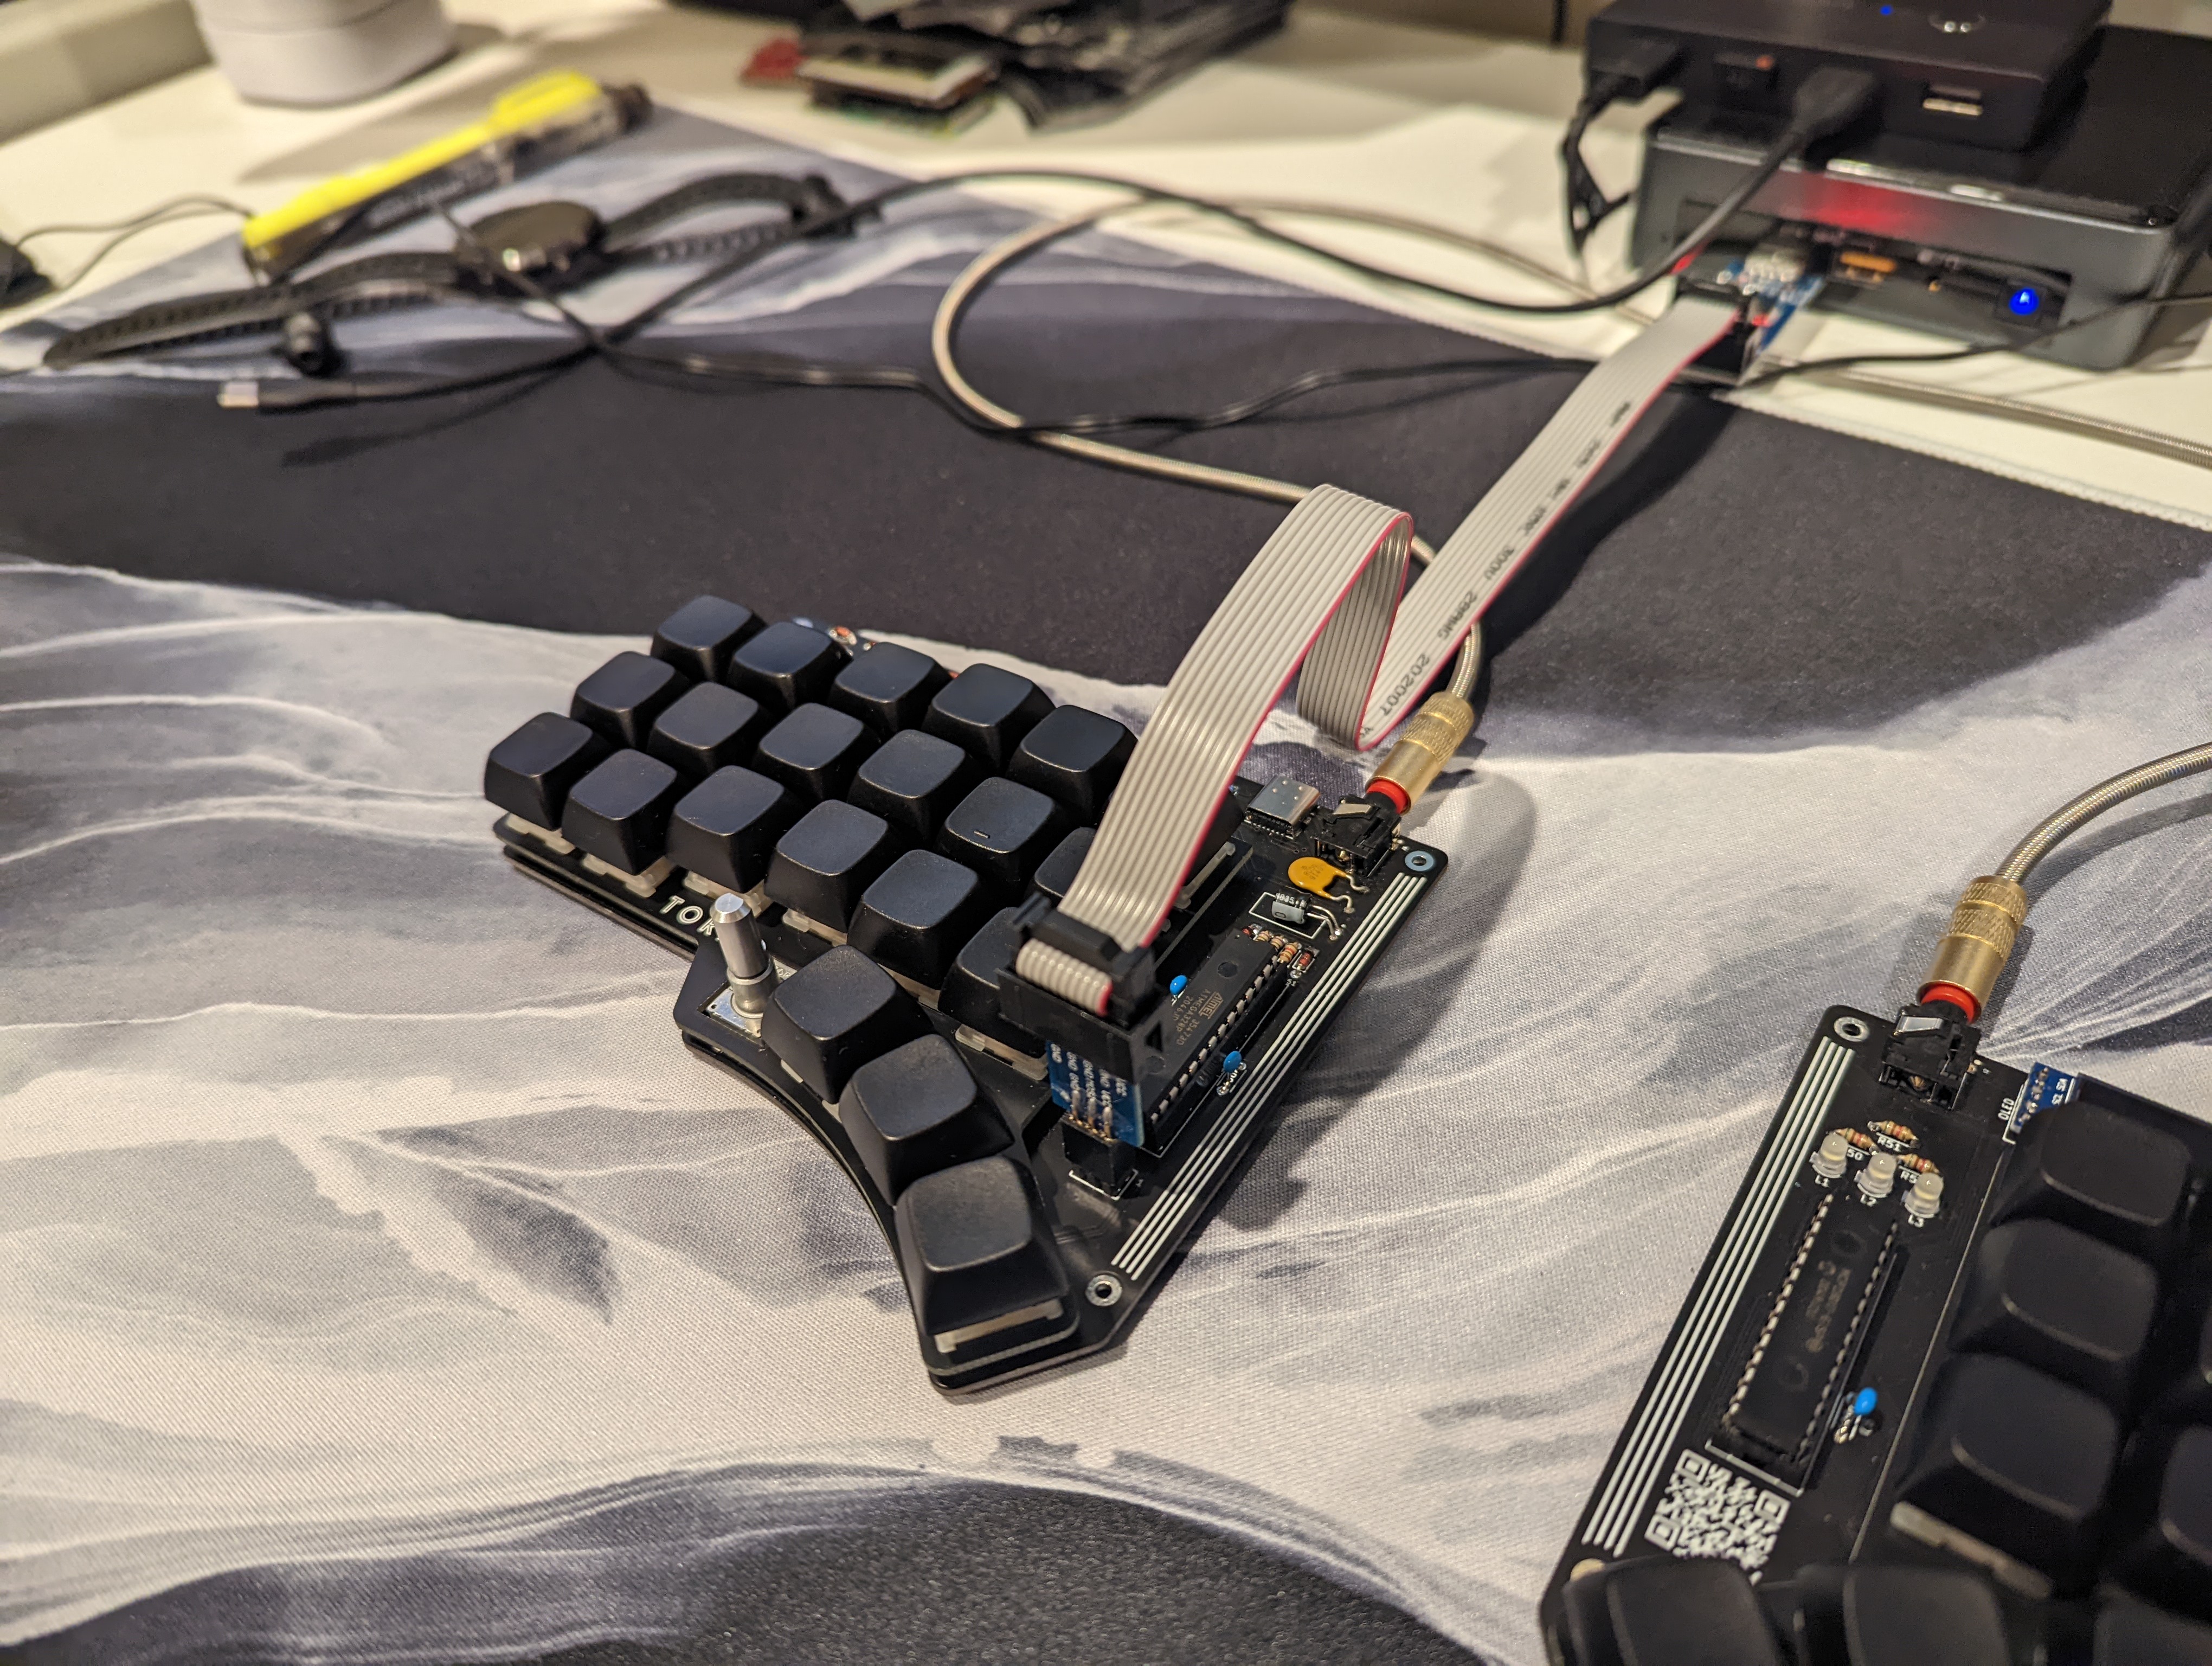
Torn
In general, the documentation for the Torn keyboard is very good. The docs also include a detailed page on how to flash the bootloader.
Purchase a USBasp programmer with an ICSP pin adaptor (ASIN B0885RKVMC).
Git clone the torn branch of rtitmuss’s USBaspLoader fork:
git clone -b torn https://github.com/rtitmuss/USBaspLoader.git
Rename the directory from UsbaspLoader to USBaspLoader-torn, just so you don’t get confused if you have to upload the bootloader for other keyboards via USBasp. Then, cd into the root of the USBaspLoader-torn directory. Open up the Makefile.inc file with your favourite text editor. Observe lines 39-41 of the Makefile.inc:
# PROGRAMMER = -c pony-stk200
# PROGRAMMER = -c usbasp
PROGRAMMER = -c avrisp -P /dev/cu.usbmodem* -b19200
Change the PROGRAMMER to -c usbasp, because we’re using a USBasp bootloader:
# PROGRAMMER = -c pony-stk200
PROGRAMMER = -c usbasp
# PROGRAMMER = -c avrisp -P /dev/cu.usbmodem* -b19200
Connect the ICSP cable from the USBasp programmer device, to the 6-pin ICSP header on the right-handed Torn PCB.
Do not yet plug in the USB cable. Only the ICSP cable should be plugged in. From USBaspLoader-torn, which has the makefile.inc file, run the following:
make
make flash
make fuse
Unplug the ICSP header, and plug in the USB cable. Then, do the following so the keyboard knows that it’s about to receive some new firmware:
- Push and hold the RESET switch.
- Push and hold the BOOST switch.
- Release the RESET switch.
- Release the BOOT switch.
Then, navigate to your qmk_firmware directory, and flash the Torn’s firmware like you would for any QMK-compatible keyboard:
qmk flash -kb torn
Unplug the keyboard, and then plug it back in. Yay! ![]()